And now closing the circle!
When you have knotted quite some part of the motifs next to eachother, you can go closing the circle, so you will get a, closed on the edges, whole. And this is really super simple!

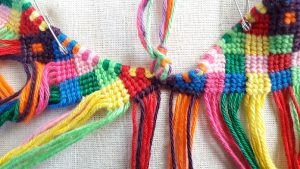
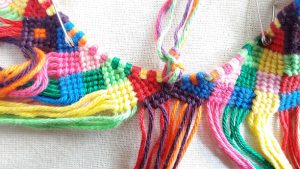
To close the circle, you take the left and the right side of your work and bring them together. Make a knot in the upper border threads, so you will get these two sides as closely together as possible. In the first rows the work has a tendency to move apart from eachother, so it is necessary to really pull the first knots tight. Next you treat this just like you are knotting 2 motifs next to eachother.
Pay attention!
Maybe you know, but I will mention it anyway. When you were knotting the very first row right at the start, where you had to create the starting position for the threads for the rest of the pattern, you didn’t use that very first purple thread on the left side! You actually couldn’t, because you had to keep it for the moment you had to close the circle. Same for the last yellow thread on the rigth side. These 2 threads are now next to each other when you bring the left and right side of your work together (yellow is now on the left and purple on the right), so do not forget to make this knot of the first row!
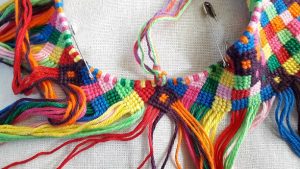
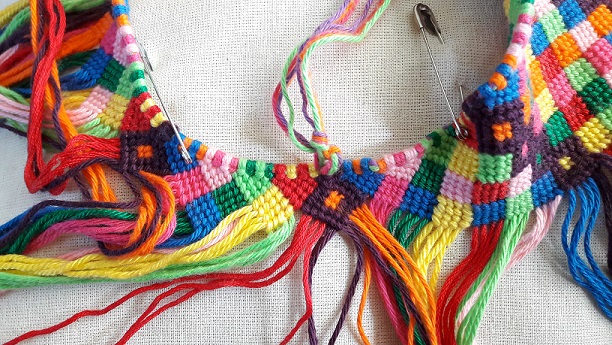
I will show you some more pictures of the next steps:

at step 1 you make the first row of the zigzag-diamondshape, at step 2 the second row, and step 3 shows how it looks when you’ve finished the diamond-shape at the closing-position. After this the knotting is just like the rest of the bag.

Next time
In my next blog I will show you how, and why I made a change in the design for the purple zigzag-border. A short blog this time, but the next will be coming soon! So, see you soon!

